Transfer Data
After you have added a Device to your Tenant (see Add a Device),
you are able to transfer data that you collect from your Assets via the Device
to NOA Portal.
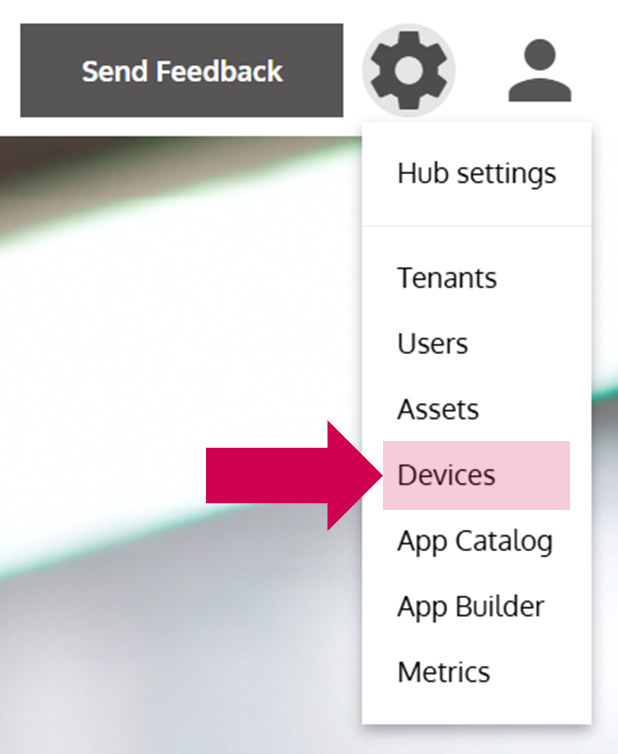
- Open the Device Management
… via the Options Menu by clicking on Devices.
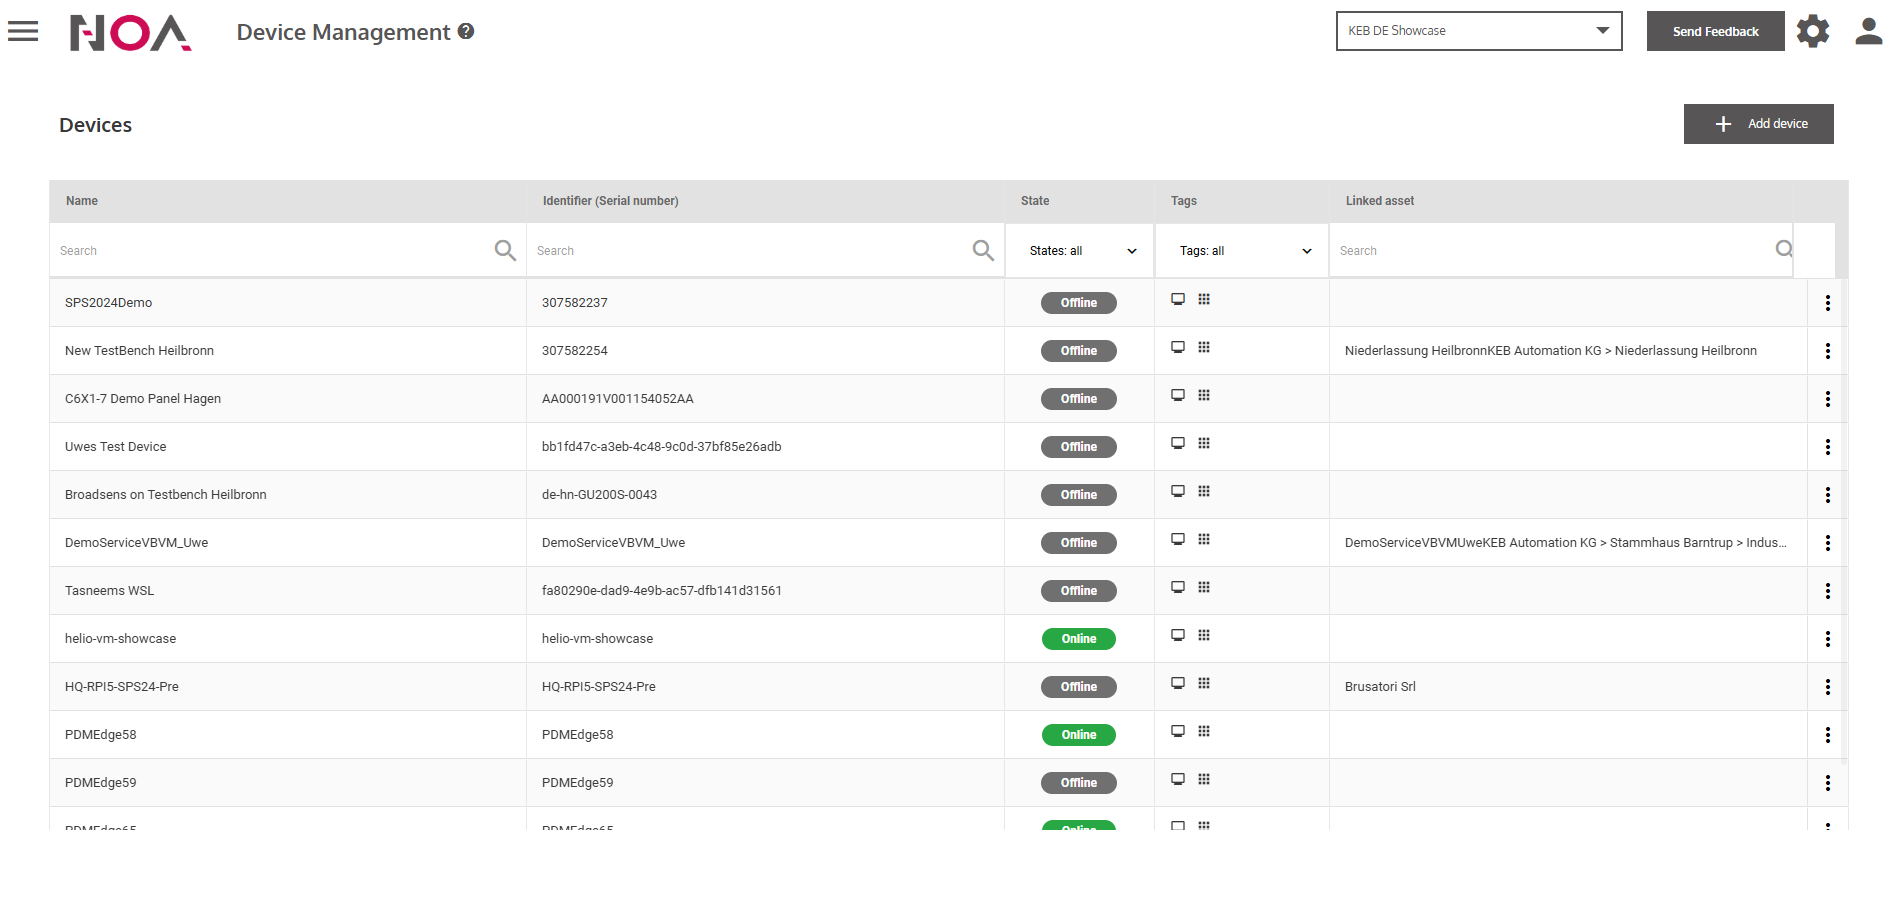
- Click on a Device in the Device Table
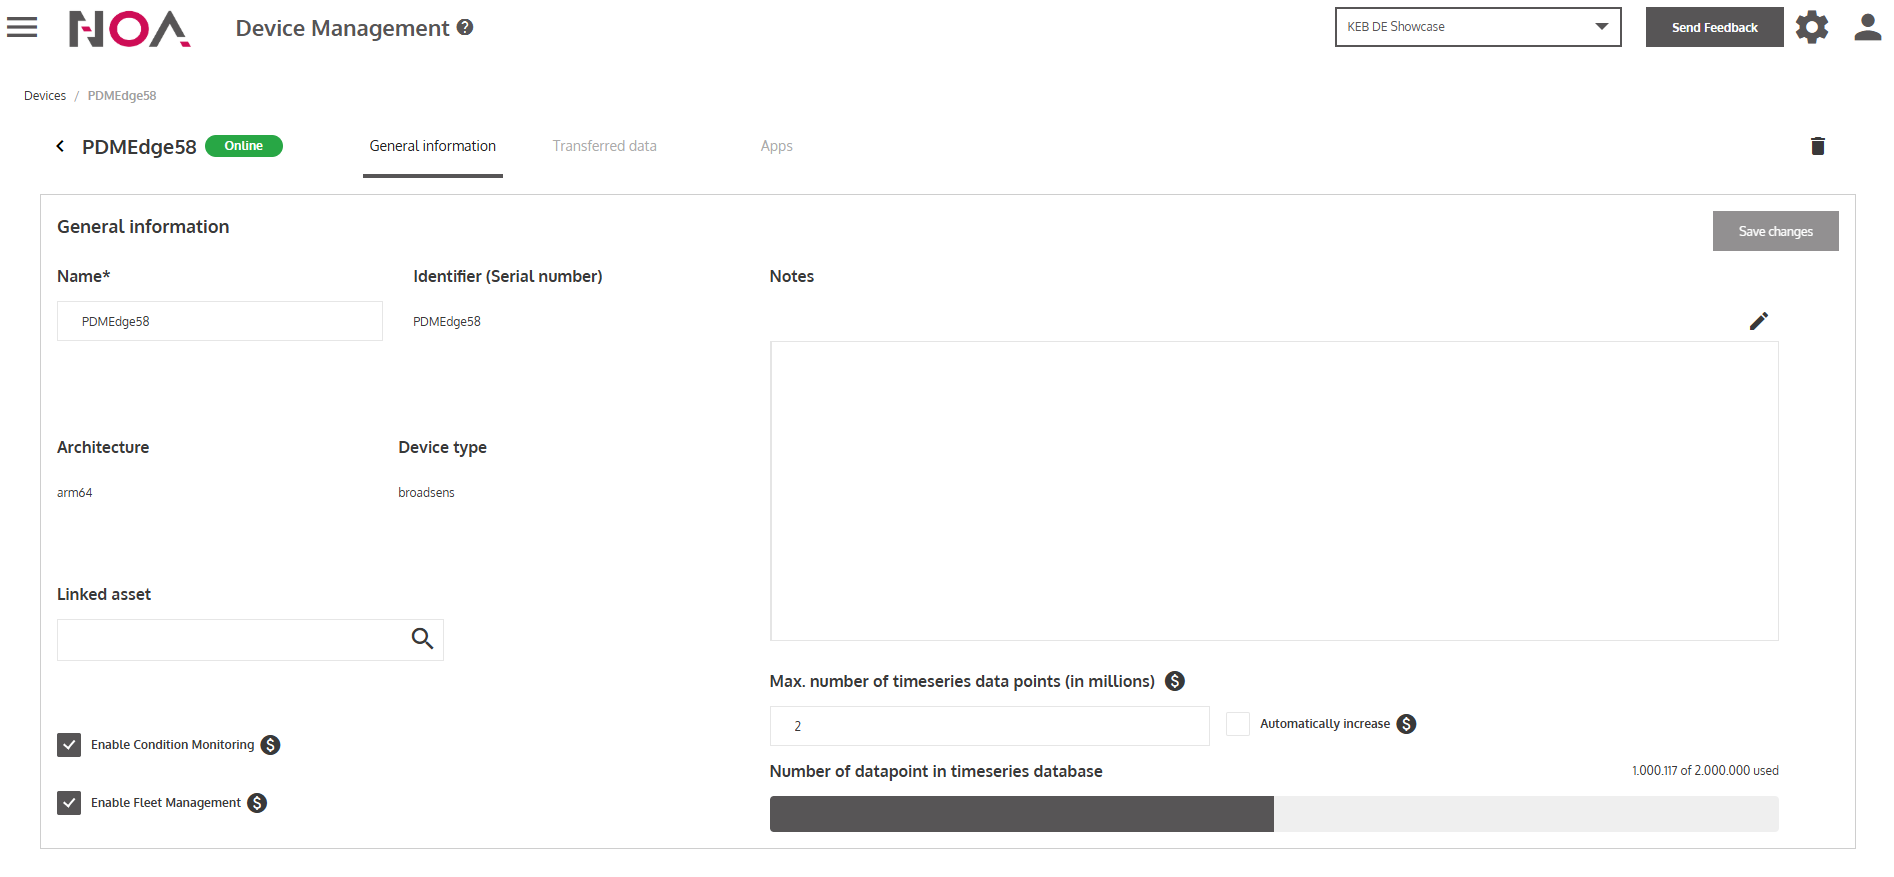
- Make sure that Condition Monitoring is enabled
Toggle the checkbox Enable Condition Monitoring at the bottom left in the General Information tab.
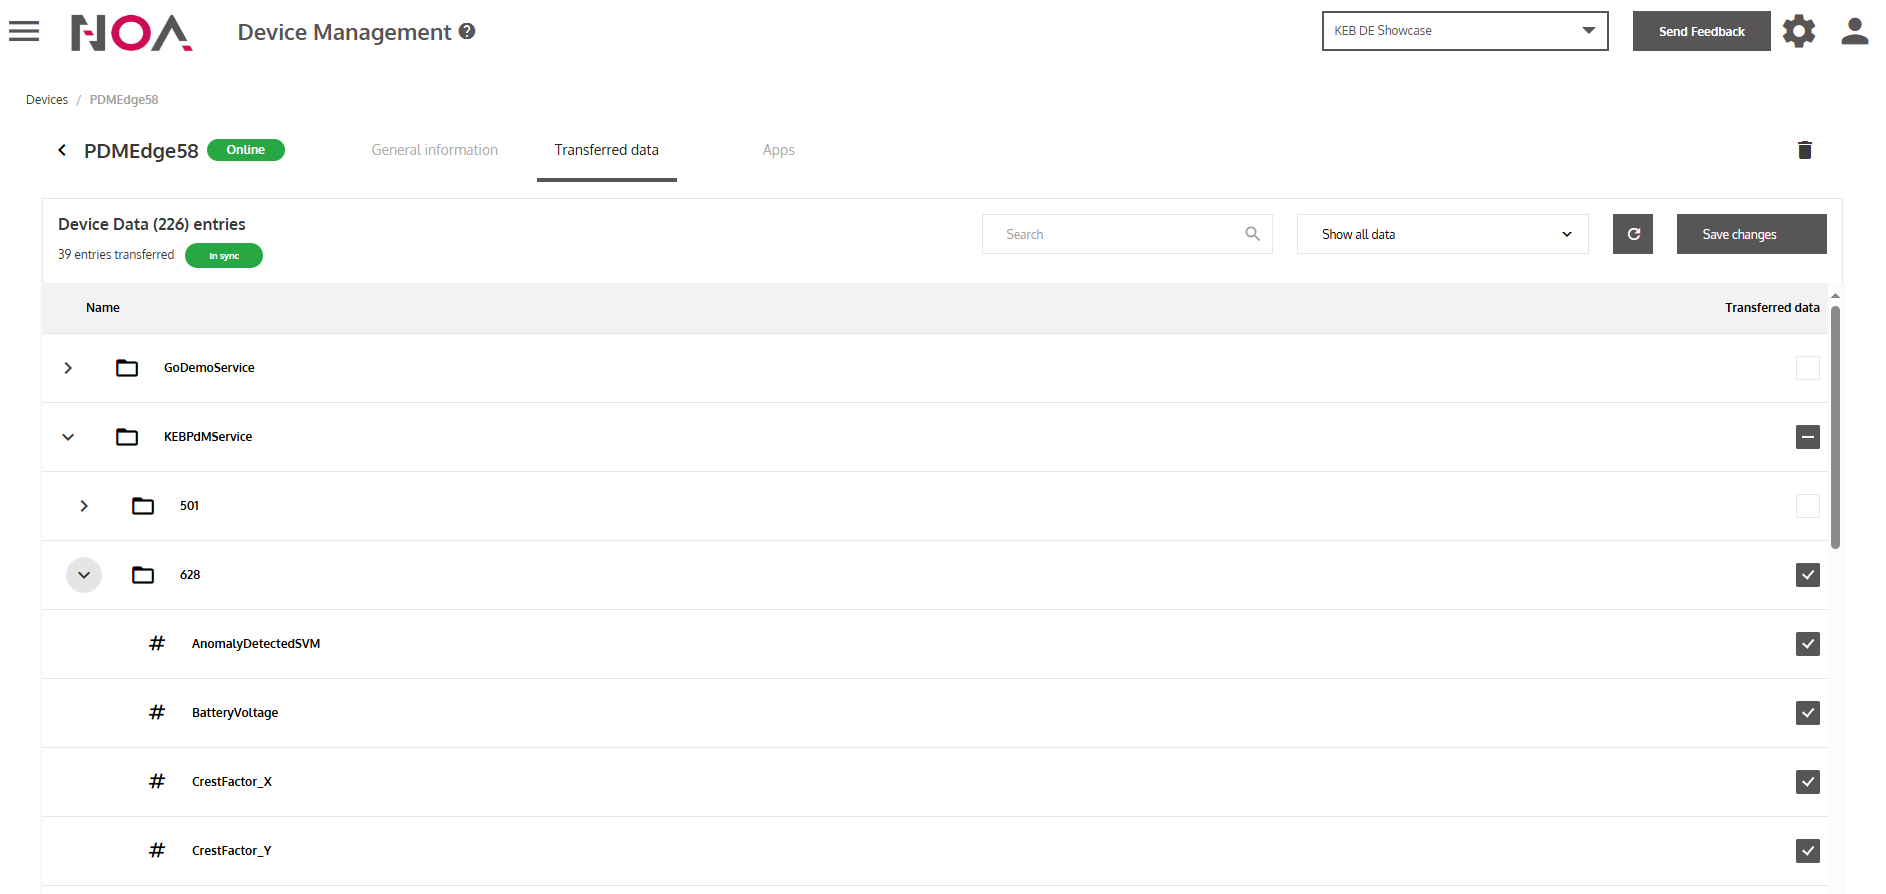
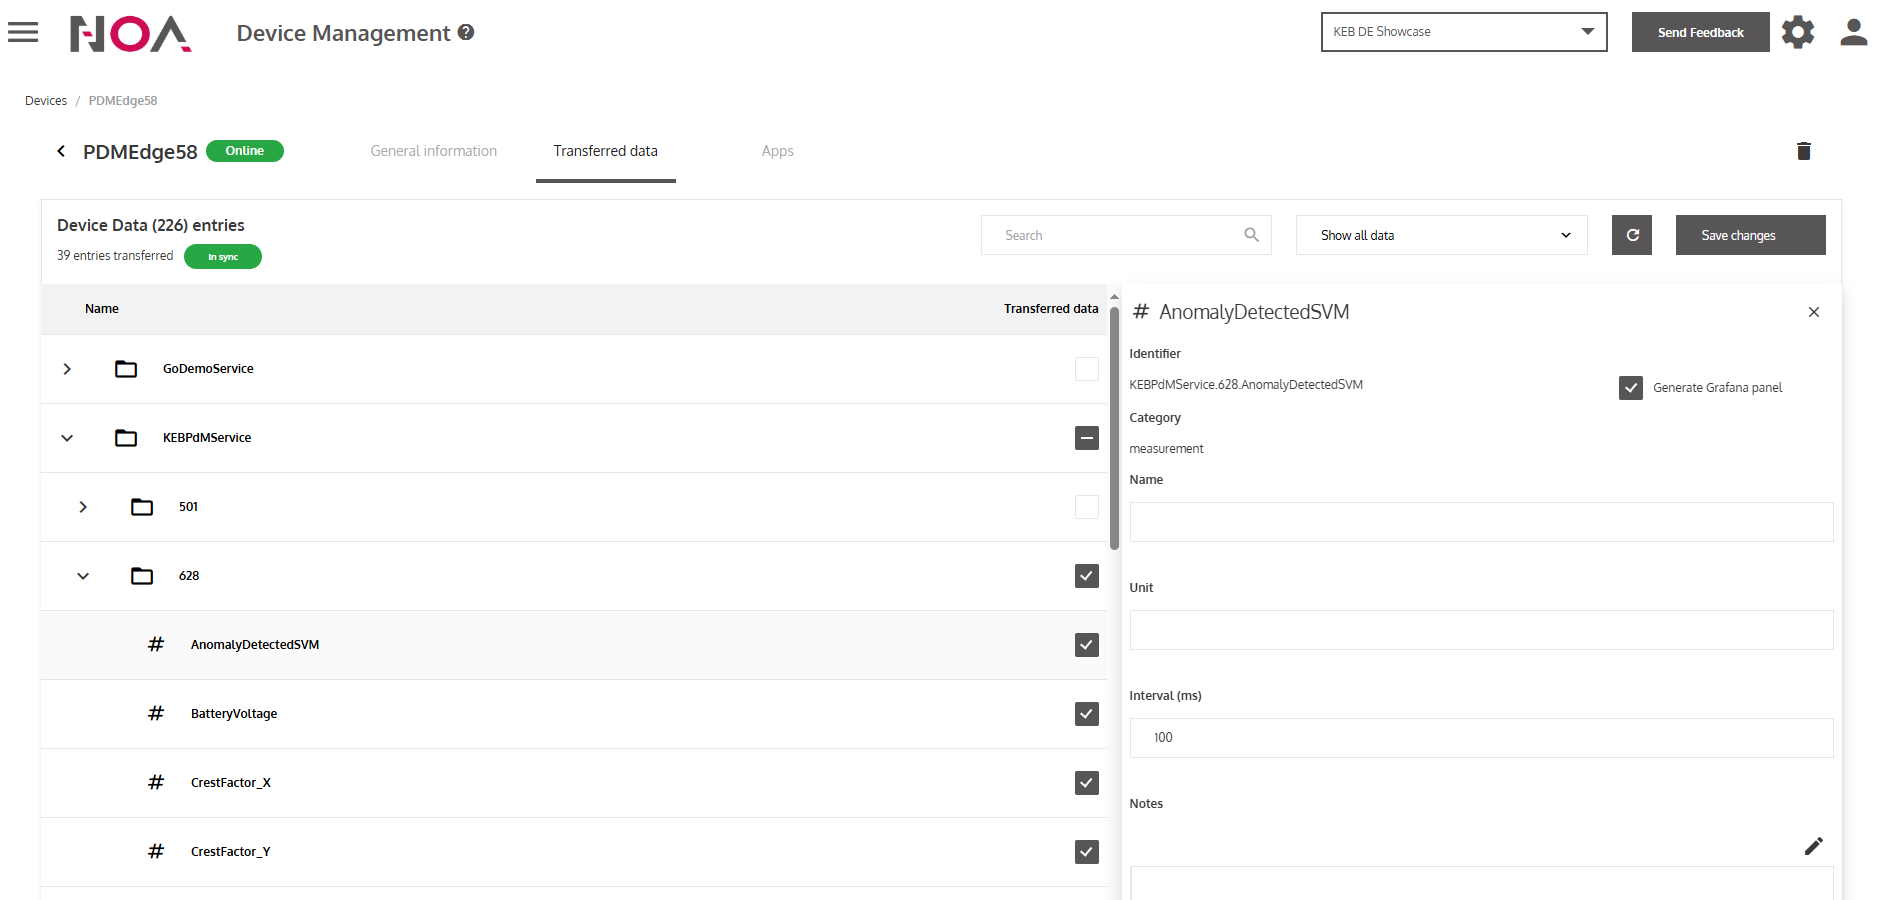
- Open the Transferred Data tab
Here you can see a tree of all the data that is able to be transferred to NOA Portal via your Device.
For further information about how to generate these folders of your Device data, visit the Transferred Data page in the REFERENCE section.
- Subscribe to datapoints
Mark the checkbox at the right side of the datapoint.
- Generate a Grafana panel
Click on the datapoint to open a Detail view. Mark the checkbox Generate Grafana panel to automatically generate a default Grafana panel to visualize the data.
You can access the generated Grafana panels via the Data Analytics Tile on the Hub.
- Click on Save changes
Afterwards your datapoint is subscribed to and will be transferred to the Cloud.
You have subscribed to a datapoint. Your Device will now send data to NOA Portal and you can view it in the Grafana Panel that you have created as well. The data will be historized in a timeseriesDB and you are able to download it (see Data Analytics) and use it for Data Analytics Use Cases, e.g. training an AI model for Anomaly Detection.